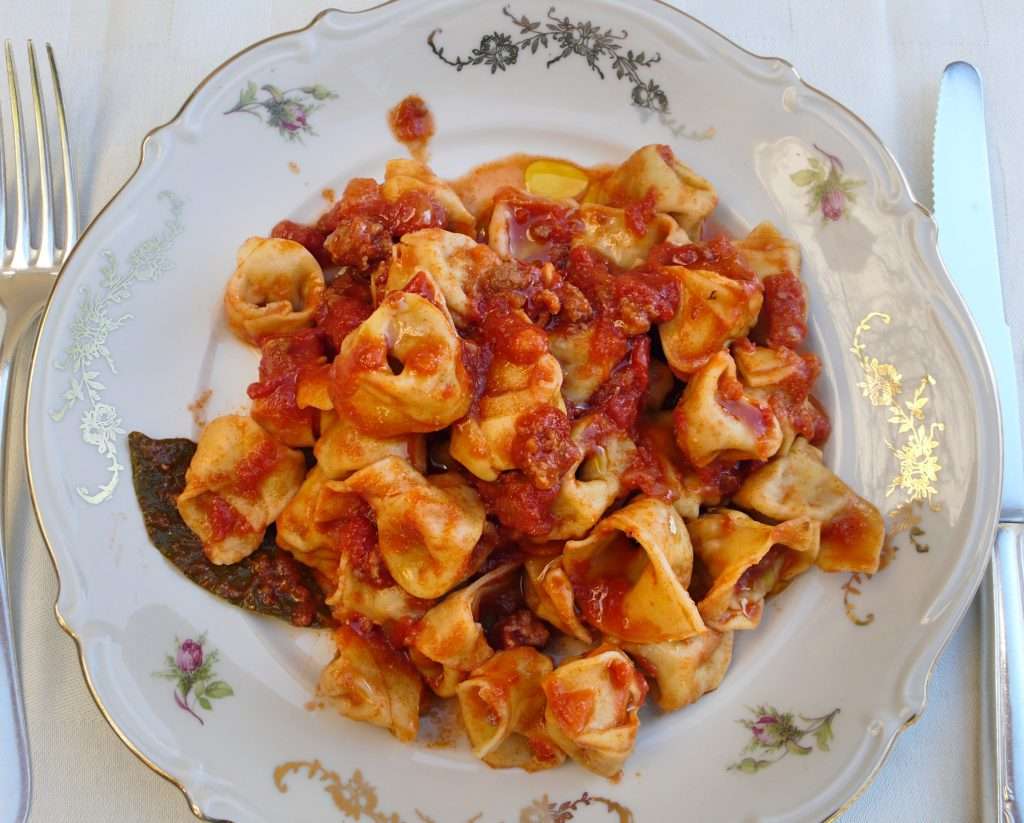
This recipe brings me back to our time at our farm in Assisi. Fall was very busy as our agriturismo B&B was often full with guests who had come to enjoy the beauty and aromas of the Umbrian countryside. A simple sheet pan dinner was often a life saver after a long day and gave us the time to finally sit in the garden and enjoy the sunset.
Here in Rome, we don’t have the same views from home, but the golden hour at Colosseum, just 15 min from where we live, is not bad at all.
Recipe
Ingredients
2 best quality pork sausage (200 g /7-8 oz)
4 small zucchini
1 tablespoon raisins
2 cloves of garlic, unpeeled
2 teaspoons extra virgin olive oil
a handful of fennel leaves or flat leaf parsley
Directions
Preheat the oven at 210 °C (410°F), use the fan if available.
Clean and top the zucchini, then cut them into 1/2 cm (1/4 inch) thick slices. Place in a sheet pan or a thin oven pan and mix with salt, black pepper and olive oil. Add raisins, garlic cloves and the sausages, cut crosswise into 4 pieces each.
Roast for approximately 30 minutes until the sausages are nicely browned and the zucchini cooked through. Fan works wonderfully with this recipe, but make sure to check and stir every 10-15 minutes to avoid scorching the ingredients.
Once ready, press the garlic out of the skin and mix it with the other ingredients, sprinkle with fennel fronds or chopped parsley and serve immediately.
This is a great appetizer, light, colorful and very easy to prepare. At home, we often have a few slices as a quick lunch. We call it pan-pizza as “pane” means bread in Italian, and it’s topped like a pizza. It’s delicious both warm and at room temperature and it’s great for parties. Just cut each slice in finger-food size pieces add some chopped olives or a few bits of roasted peppers for variety if you like and serve. The secret to get the pan-pizza right is to use excellent ingredients in modest amounts. If you overload the bread with too much topping it will become heavy and soggy while you want it light and crispy. Drizzle with your best extra-virgin olive oil, but only when ready to serve. The oil will make everything beautifully shiny and bring out the flavor of the other ingredients.
For a vegetarian version, use finely minced sun-dried tomatoes instead of anchovies.
4 slices low-salt rustic Italian bread (not baguette) 200 gr (8 oz) fresh mozzarella, drained and sliced thin 10-12 ripe cherry tomatoes, diced 4 anchovy fillets 1 garlic clove, peeled dry oregano, salt, blac pepper and extra virgin olive oil
Preheat the oven to 230 °C (430° F). Toast the bread slices until lightly brown and – once ready – rub one side with a clove of garlic. Arrange in a roasting pan lined with tinfoil to prevent sticking.
Place a slice of mozzarella on top of each slice of bread and then one or two small pieces of anchovy (1 cm/0.5 inch long). Spoon the diced tomato on to each slice of bread. Sprinkle with oregano, salt and pepper. Place the pan into the oven and bake for 5 to 7 minutes or until the cheese is melted. Drizzle with extra-virgin olive oil and serve.
At this time of the year, every pastry shop in Rome will offer a version of Torta di mele (apple cake) or Crostata di mele (apple tart), but I like to make my own. There is nothing more comforting than the aroma of apples, spices and butter baking in the oven on a winter morning.
Today I’m presenting you with my crostata di mele recipe, a rustic Italian apple tart which is easy to make, perfect for breakfast, afternoon coffee, or dessert. I use pastafrolla, a classic Italian shortcrust pastry. Apples are mixed with spices and citrus peels and stir-fried quickly on high heat to prevent them releasing juices while they are cooking in the pie. The result deliciously crunchy and crumbly crust with a fragrant, but not overly sweet filling. Heaven in a plate.
Ingredients
Crust
250 g (2 cups) all-purpose flour (low protein content ma x 10%) or stoneground Type
1/4 teaspoon table salt
1 large egg
150 g (3/4 cup) white sugar
125 g cold unsalted butter (9 tablespoons) diced
1/2 teaspoon cinnamon
1 tablespoon water
Filling
3 thinly sliced apples preferably Granny smith or other tart apples (from about 700 g or 1 1/2 pounds whole apples)
1 tablespoon lemon juice
2 tablespoons white or light brown sugar
1 pinch table salt
1 teaspoon cinnamon
1/4 teaspoon ginger powder
rind of 1/4 lemon cut in 1–2 strips
grated peel of 1 orange
Equipment
Pie pan 25 cm, lined with parchment paper
clingfilm
silicon brush
sieve
To make the filling:
Using a large shallow pan or non-stick wok, heat one teaspoon butter and, as soon as the butter is melted, add apples, lemon peel, sugar, salt, spices and quickly stir. As soon as apples have slightly softened and have changed color, add lemon juice, stir again and remove from heat. Let them cool to room temperature, then drain any juices.
To make the crust:
Using a food processor with the blade attachment, mix flour, salt, orange peel, cinnamon and sugar. Add the cold butter, a few pieces at the time until incorporated. Whisk the egg, reserve two teaspoons of it in a small bowl and add the rest to the dough. Process quickly until the dough forms a ball or large clumps. Should the mixture be too dry to form a dough, add 1 teaspoon of cold water at the time – no more than one tablespoon – and process briefly in between. It’s important not to overwork the dough as the pie will become tough.
Transfer the dough over your worktop, fold it over on itself three or four times to bring it together, then divide it into two pieces, one about twice as large as the other. The larger piece will be the bottom crust; the smaller piece, the top crust.
Sponge your worktop to make it slightly wet. Place a piece of clingfilm on it which must be larger than the pie. The plastic wrap will stick to the wet surface. Place the larger piece of dough on the clingfilm. Press it into a disk, then roll it about 1/2 cm (1/4 inch) thick.
Invert the disk onto the pie pan and peel off the clingfilm.
To make the “crust dust”
Mix 2 teaspoon flour with 2 teaspoon sugar. This mixture, also named crust dust, when sprinkled into the bottom of the crust will help prevent the crust from becoming saturated with juicy filling as it bakes. Sprinkle the bottom of the pie with crust dust, then arrange the apples in an even layer.
Sponge again your worktop to make it slightly wet. Place a new piece of clingfilm on it. Roll the top crust on the clingfilm to the size needed to cover the pie. It will be thinner than the top crust. Please be patient as crostata dough tends to break when rolled thinly.
Rolling with minimal pressure and flouring the pin generally solves the problem. Slide both hands underneath the clingfilm, lift the disk of dough and invert it carefully over the pie.
Peel off the cling film, pinching to seal the two and making a crimp.Brush the top of the pie with the reserved whisked egg. Using a large sieve, sprinkle the pie with granulated sugar.
Place the pie in the refrigerator for 30 min or in the freezer for 10 minutes.
Preheat the oven to 180°C (355°F).
Place the pie on a baking sheet. Bake the pie for 30-45 minutes, until nicely golden. It will be ready when the edges of the crust retreat from the side of the pan.
Remove it from the oven and cool completely before slicing. Unlike classic apple pie, crostata is always served at room temperature and without sauces, cream or gelato.
Store any leftover pie, lightly covered, in the refrigerator for several days. Serves 8.
Stuffed pasta like cappelletti, ravioli and tortelli are traditionally served for holidays in many Italian homes. Each family has its own recipe and takes great pride in both the quality of the ingredients used for the filling and the paper-thin pasta sheets that make these parcels of delight. For this recipe I took inspiration from the tortelli and tortellini made in the North of Italy and applied a dash of color to make them look even more festive.
Ingredients
1 large organic egg
120 g (13/4 cups) Italian 00 flour
100 g (3 oz) spinach leaves, washed
150 g (5 oz) roasted squash like mantovana or butternut
45 g (2 tablespoons) ricotta
50 g (3 tablespoons) grated Parmigiano plus extra to finish
2-4 sage leaves
30 g (2 tablespoons) butter
Directions
For the squash:
Roast a whole squash in the oven using the recipe with onion and sage explained here for lasagna. Once cooked, chop the onion finely, mix it back into the squash, reserve the required amount for this recipe then portion and freeze the leftovers.
Zucca mantovana is perfect for this recipe because of its sweet, aromatic and compact flesh. Please make sure to use a substitute with similar qualities, for example Butternut or Hokkaido squashes. Avoid stringy or watery squashes.
In a bowl, mix the squash, ricotta and Parmigiano with a fork until the mixture is smooth but still dense.
To make the green pasta dough:
Fill a pan with 1 cm (1/2 inch) of water, add the spinach leaves, cover and cook on high heat. Steam until just cooked through, maximum 2 minutes. Drain and refresh under cold water. Squeeze as much moisture as possible from the spinach and chop roughly. You will obtain about one handful of cooked spinach.
In a food processor on high speed, blend the spinach and the 00 flour until the leaves are cut into small particles. Add the egg and mix to incorporate to obtain a relatively firm dough. Transfer the dough into a floured bowl, cover and let it rest for at least 20 min and up to 1 hour.
Using the pasta machine, roll out the dough into thin sheets and place them on a lightly floured worktop. Trim the sheets to a width of 10 cm (4 inches).
To make the square tortelli, using a demitasse teaspoon, place the squash filling about 5 cm (2 inches) apart on the sheet – as shown in the photo above – so you can make a “parcel” by folding over the pasta sheet.
Using a ravioli wheel-cutter seal each parcel by cutting on three sides. There is no need to cut the fourth side, i.e. the fold. Make sure not to overfill the tortelli or they will explode while cooking.
If the weather is dry, cover the pasta sheets with a cotton towel. If it is humid, make sure to flour the sheets or they will stick to the worktop and might break when handling.
To make the folded tortelli, roll the dough and trim the sheets as above into a rectangular shape. Immediately reuse the scraps to make more sheets.
Using a pasta or pizza wheel, cut every sheet lengthwise into 2 equally wide strips, then cut across into approximately 5×5 cm (1 x 1 inches) squares.
Place tiny mounds of the squash filling atop each square of pasta. Each mound should not be bigger than 1/2 of a teaspoon.
Now make a triangular parcel by folding the square over by a corner, and seal it by pressing the open sides. Take the parcel and pinch the ends together to obtain the shape of a hat.
Transfer to a floured tea towel to dry.
To finish:
Bring a large pan of salted water to a rolling boil.
Melt the butter in a pan large enough to hold all the pasta, add the sage leaves, heat lightly, then and remove from heat.
Cook the tortelli in the boiling water until al dente, about 2 minutes. Drain and toss the in the butter, add the Parmigiano and 1/2 ladleful of pasta water. Stir gently over a medium heat to incorporate and absorb the pasta water.
Plate the tortelli, and serve immediately lightly sprinkled with additional Parmigiano if you like.
Serves 2.
NB. I first published this recipe in December, just before Christmas so I tossed a few tiny datterini tomatoes with the pasta to give it a festive look but – although pretty – tomato does not belong to the recipes. For color contrast and a hint of sweetness, you could also use the slow roasted cherry tomatoes from my Substack.
This silky panna cotta is a lovely, indulgent dessert to enjoy for a cozy dinner. If you plan to celebrate Valentine or another romantic event in the comfort of your own home, this is the perfect, easy dessert for two.
This recipe is incredibly simple and quick to make, but please make sure to use best quality chocolate and very fresh orange peel.
Ingredients
75 ml (1/3 cup) full fat milk
75 ml (1/3 cup) whipping cream
35 g (1 oz) 70% dark chocolate bar
30 g (3 tablespoons) white sugar
1/2 tablespoon dark cocoa powder
zest of 1/2 orange
1 1/2 sheets gelatine (4 sheets of gelatine are equivalent to one American or Canadian envelope, e.g. Knox)
additional whipped cream for decoration or a spoonful or 2 of greek yogurt, and/or crumbled amaretti cookies and/or edible petals
Directions
Soften the gelatine sheets in a bowl of room temperature water. If using Knox powder gelatine, soften 2/3 teaspoon of the gelatine in 1 tablespoon milk taken from the total 1/3 cup milk.
Bring the rest of the milk and cream to simmering point, add the chocolate, cocoa powder, orange zest, sugar and melt together.
Stir well and bring to near boiling point. Remove the gelatine sheets from water, add the softened gelatine to the mixture, stir to dissolve and then switch off the heat. If using powder gelatine, add the powder plus milk mixture.
Pour the mixture into pretty dessert bowls, crystal goblets, vintage teacups, or a pretty bowl, like the one in the photo. Cool the dessert uncovered, then cover and refrigerate until set (approximately 3 hours).
Serve topped with whipped cream and edible rose petals, crumbled amaretti cookies or other decoration.
Potato gnocchi are much beloved in Rome where you will find them served with endless variations of the local sauces: amatriciana, carbonara, gricia and cacio e pepe.
Classics like ragù and gorgonzola are popular too, but for everyday meals I prefer lighter sauces like puttanesca, tuna and tomato and my absolute favorite, mixed fresh seafood.
Every market in Italy sells a mixture of fresh or frozen seafood that is often named “misto mare”. The misto might include shellfish like shrimps, clams and mussels mixed with with diced fish fillets, calamari and squid.
The misto mare is used to make pasta all scoglio (sea rock pasta) that is based mostly on shellfish and to make pasta alla pescatora that is based mostly on fish fillets plus calamari and shrimps.
Pasta alla pescatora made with fresh seafood truly tastes like the sea captured on a plate.
The sauce is light, yet deeply flavorful, infused with garlic, fresh tomatoes, and the briny sweetness of juicy shrimps. If you can’t buy the misto, it’s easy enough to make it with fish fillets and shellfish of your choice but if you include calamari, please make sure to cut them in quite small pieces or they will not cook with the rest of the fish.
For this recipe I follow the unconventional method of cooking the seafood with the gnocchi for one minute only, then drain and toss with the tomatoes. It is of fundamental importance that you serve the gnocchi as soon as they are sauced, so prepare the tables and a nice chilled white wine and be ready to enjoy.
Recipe
Ingredients
350 g (12 oz) fresh potato gnocchi, better if homemade
250 g (1/2 lb) fresh mixed seafood
1 clove or garlic, finely minced or grated
5-6 small plum tomatoes or cherry tomatoes, diced
1 sundried tomato, finely minced
a pinch of chile flakes (optional)
3-4 sprigs of flat leaf parsley
In a shallow pan that must be large enough to hold the sauce and the gnocchi, sauté the garlic over low heat with the sundried tomato, a few whole parsley stems and, if using, the chili pepper. Cook until the mixture is fragrant, approximately 1 minute, but don’t brown the garlic.
Add the diced fresh tomatoes, stir, cover and remove from the heat.
Chop the parsley. Reheat the sauce and keep warm. Remove the parsley stems.
Bring a large pan of salted water to the boil and add the gnocchi and the seafood at once. Boil for un minute, remove the gnocchi and fish quickly with a fine-mesh pasta strainer or slotted spoon and transfer into the sauce.
Stir lightly to incorporate, plate, drizzle with your best olive oil and serve immediately.
Ferragosto is the Festa Grande in Italy. A major holiday established in 18 BC by Emperor Augustus, it’s been later transformed into the Christian feast of the Assumption of the Virgin Mary and celebrated on August 15th.
The whole country is on holidays and this special days is celebrated with local foods and large amounts of watermelon.
At this time of the year, the large fruits are crispy, deliciously sweet and provide a wonderful respite from the heat. There is no picnic or dinner on a breezy terrace without watermelon as a dessert.
Growing up in Umbria, we often celebrated Ferragosto with a picnic in the hills near Perugia, my hometown. For family gatherings, my mother and aunts always prepared this upgraded version, the “macedonia di melone”. A giant watermelon is used as a “bowl” for a fruit salad soaked in vermouth or dessert wine.
For smaller parties, I use baby watermelons and if I really don’t have time, I just make the macedonia in a bowl. Just make sure to cover the fruit salad and let it marinate in the delightful liquor for several hours, better if overnight and up to 24 hours.
Directions
Ingredients
1 small watermelon (about 2 1/2 kg or 5 lb.) preferably round in shape
1/2 cup each of diced peaches, watermelon, cantaloupe, green grapes or quartered plums (about 500 g / 1 lb of diced fruit in total)
zest and juice of one small lemon
4 tablespoon sugar
2-3 cups dessert wine like moscato or Vinsanto or white Italian vermouth
If you want to make the macedonia without the watermelon “bowl”, decrease the sugar to 2-3 tablespoons. Use the juice of half lemon and 1/3 cup wine or vermouth. Taste and adjust accordingly.
Prepare the melon “bowl”
With a large, sharp knife, remove the top section of a watermelon, just below the insertion of the stem. Make sure the watermelon can stand vertical, cut side up. If necessary, cut off a slice at the bottom to make it flat. If your watermelon is really large and oblong, you might have to cut it so that it can stand horizontal.
With a metal spoon, scoop the pulp from inside the watermelon, then dice, removing as many seeds as possible. Leave 2 cm (2/3 inch) of flesh inside the shell of the watermelon.
Assemble the macedonia
Place all the cut fruit and lemon zest inside the watermelon. You might need more fruit in the case of a larger watermelon, or you will need to set aside any fruit mixture that will not fit.
Mix in the lemon juice and sugar and toss thoroughly. Add wine or vermouth to cover the fruit. Cover and refrigerate for at least half a day.
Serve well chilled, and when the fruit is finished, scoop out the watermelon flesh inside the shell, which will taste wonderfully fruity and boozy.
In my family, the combination of ricotta, orange and chocolate – the classic filling of Sicilian cannoli – an object of reverence, especially when using homemade candied orange peel. In the winter we love it in the fabulous crostata below and, when it gets warm, we churn it as a delightful gelato.
One of my favorite kitchen tools is a simple, inexpensive gelato maker. It’s a basic model that uses a pre-frozen canister with a coolant lining to chill the gelato mixture, eliminating the need for ice, salt, or a costly compressor (this is just an example).
Please note that most of my gelato recipes are eggless, so there’s no need to cook anything. As a consequence it is very easy to make gelato at home provided that one has the time to cool off the custard and churn it, approximately one hour.
For a dinner party, I usually blend the ingredients—cream, sugar, and flavorings—and let the mixture rest in the fridge until it’s time to serve dessert. I start churning the gelato just before the meal, and by the time we’re ready for dessert, it’s fresh, silky, and perfectly soft.
Freshly made gelato is worlds apart from anything store-bought, and it’s surprisingly easy to prepare. While this method only allows you to make one flavor at a time, please trust me—no one will complain, and there won’t be a single scoop left over.
Ingredients
170 g (6 oz) fresh ricotta
80 ml (1/3 cup) whole milk
250 ml (1 cup) whipping cream
110 g (1/2 cup) white sugar
40 g (1 1/2 oz) dark chocolate, shaved with a mandolin
1/2 teaspoon powder cinnamon
grated zest of half an orange or 2 teaspoon homemade candy orange, finely chopped
Directions
Combine ricotta, milk, cinnamon and sugar in a blender. Blend until very smooth, then add cream.
Transfer the mixture in a closed container, cover and refrigerate until completely cold. This will shorten the churning time.
Churn in an ice cream maker until thick and creamy. Mix in the shaved chocolate and the orange zest or decorate with finely diced homemade candy orange.
Outside of Italy and aside from gnocchi, potatoes aren’t usually associated to Italian cuisine.
In reality, Italians have a deep appreciation for potatoes, particularly when baked or “gratinate” (au gratin). The au gratin method combines sliced potatoes and other vegetables with milk, cheese, or cream, creating a dish with a golden, crispy crust and a tender, flavorful interior.
In today’s recipe, anchovies and oregano add a distinctive touch, evoking the flavors of “Pizza Napoli” (a classic Roman pizza, not to be confused with Pizza Napoletana).
my family’s favorite pizza with tomato, anchovies, mozzarella and oregano
It is essential to use really good quality, aromatic oregano and good anchovies preserved in olive oil.
I prefer using microwaved potatoes for this dish—they’re quick, easy to prepare, and crisp beautifully in the oven, as they don’t retain extra moisture from boiling.
Like pizza, this recipe might serve as a canvas for endless variations. That said, in keeping with the spirit of authentic Italian pizza, remember to layer ingredients sparingly, avoid overloading the potatoes with cheese, and, of course, no pineapple! 😂
Ingredients
4 medium, unpeeled yellow potatoes, washed
2 fresh vine or 8 small plum tomatoes or 200 g (approx 7 oz) canned crushed tomatoes
125 g (4 oz) fresh mozzarella, thinly sliced
2-3 anchovy fillets, broken into small pieces
1 teaspoon best quality oregano
2-3 leaves fresh basil (optional)
For a vegetarian version, substitute anchovies with 2-3 very finely chopped sundried tomatoes.
Directions
Dice or slice thinly the fresh tomatoes and the mozzarella. Oil a 30×30 cm (12×12 inch) non stick oven pan or baking dish.
Pierce each potato 3-4 times with the tip of a sharp knife. Transfer into a glass or ceramic dish, cover and microwave on maximum for 5-10 minutes until potatoes are fork tender but still firm enough to slice. The cooking time depends on size of the potatoes so make sure to check every 3-4 minutes to avoid overcooking.
Preheat the oven at 220°C (430°F).
Once cool enough to handle, slice the potatoes into 1/2 cm (1/4 inch) slices and arrange them in a single layer into the oiled pan.
Top with the other ingredients in the following order: mozzarella, anchovies, tomatoes, oregano, salt, black pepper and a drizzle of extra virgin olive oil. Make sure to top each slice of mozzarella with a tiny piece of anchovy.
Here below is an earlier version made with canned tomatoes and uncooked, paper thin potatoes.
Unless you have a professional mandolin, par-cooking the potatoes in the microwave is much easier and faster than slicing.
Bake for 20-30 minutes until the cheese and anchovies are nicely melted and just starting to brown. Remove from the oven and sprinkle with fresh basil, if using.
The version with thinly sliced potatoes, after baking. The version made with microwaved potatoes and fresh vine tomatoes plus a few plum tomatoes I happened to have in the refrigerator
Serve immediately, best if accompanied by a crispy, lemony, lettuce salad.
Serves 2 as a light meal or 3-4 as an appetizer or snack.
Ragù is one of Italy’s culinary treasures. Outside of Italy the term “Bolognese” or even the oddly spelled “Bolognaise” has become a synonym for any Italian meat sauce. This cannot be further from reality. Every region, every home has is own recipe which is taken seriously and often passed through generations.
Ragù might be made with different cuts and types of meat which might be minced or cut into whole pieces. In addition, ragù might be made with fish and include various proportions of tomatoes or not at all. A ragù without tomato is called ragù in bianco (white).
My own pork and beef creamy white ragù made with soffritto, wine and slowly simmered with a reduction of chicken broth. No cream!
Throughout my childhood, my mother made a huge pot of ragù every week which we would eat for our late lunch when we returned home after school and work. Even the dog and the cat often ate pasta with ragù and a sprinkle of Parmigiano for lunch.
For my mother we all were family and deserved the same meal. If you were wondering if that was good for the pets, consider that the dog lived until she was 22 years old and the cat also became very old. So, may be, my mum was right.
To make the sauce, she cooked chunks of several types of prime quality meat – beef, pork and occasionally pigeon – with lots of olive oil and plenty of homemade tomato passata. It was divine but by the time my brother and I were teenagers we had become bored with that sauce. We wanted tortellini with cream, pesto, risotto, all those exotic dishes that appeared from other regions and became all the rage in the 1970s and 1980s.
I remember my first taste of a ragù bianco in a trattoria near Florence. My parents would drive us two hours in their little fiat 500 to eat pappardelle (wide fettuccini) served with a wild hare ragù. As you probably know, game has always been a delicacy in Italy. Even then the fame of a special dish would travel far and wide.
I must have been 11 or 12 years old, not especially adventurous with food, but I can still picture the delicate strands of homemade pasta doused with that velvety sauce. The ragù was intense and delicate at the same time, with hints of wine and herbs from the woodlands, and curls of cheese – may be a Pecorino – to balance the sweetness of the meat.
For years, I had more or less forgotten about that experience, may be because I have been so focussed on cooking and eating vegetables. Last spring however, my friends Tracy and Matt asked me to include a ragù bianco in their cooking class. I thus embarked in a culinary research spree. Eventually, I came up with this recipe which, although not made with game, still has that delicate and complex flavor from my childhood. I hope you enjoy it too, it’s a real treat which – provided that you have access to good quality meat – will make any meal truly special.
Recipe
Ingredients
For the ragù:
200 g (7 oz) beef chuck (in Italy: fracosta or reale), minced
150 g ( 5 oz) pork sausage, not spicy, casing removed
1 tablespoon butter
1 tablespoon extra virgin olive oil
1/2 onion (about 50 g / 1 and 1/2 oz)
1 stick celery
1 carrot (about 15 cm long / 6 inches)
1 bay leaf
1/2 teaspoon peppercorns
zest of 1/4 lemon
1 teaspoon cornstarch
1/4 cup white wine
1/2 l (2 cups) homemade chicken broth, low or no-salt
Finely dice carrot, onion and celery. In a large shallow pan or skillet, combine olive oil, butter and vegetables and cook, over low heat, stirring occasionally, until they are softened and just translucent. Add the bay leaf, lemon zest, peppercorns and cook, stirring frequently, until fragrant, about 30 seconds.
Add the meat, increase the heat to medium-high, and cook until starting to brown. Sprinkle the corn starch over the meat, then deglaze with wine, scraping the brown bits from the pan. As soon as the alcohol is evaporated add 1/4 of the broth.
Partially cover the pan using a wooden spatula across one side of the pan to let the wine evaporate slowly. Keep reducing the broth and adding more, about 1/4 cup every about 15 minutes, until the meat is completely tender and coated by a glossy, amber sauce. Only at this point adjust salt and if needed, add additional, freshly ground black pepper.
When the sauce is almost ready, bring to the boil a pan of well salted water, cook the pappardelle al dente (about 1 minute). Pick them from the water with a spider skimmer or tongs and toss them rapidly in the sauce, adding a few tablespoon of pasta water to bind the pasta to the sauce. If the sauce is too liquid, increase the heat to absorb the extra moisture and serve, sprinkled with Parmigiano and a drizzle of your best extra virgin olive oil.
Per offrirti un'esperienza di navigazione ottimizzata, questo sito utilizza cookies, anche di terze parti. Chiudendo questo banner, scorrendo questa pagina o cliccando qualunque suo elemento acconsenti al loro impiego.


 Invert the disk onto the pie pan and peel off the clingfilm.


 Peel off the cling film, pinching to seal the two and making a crimp.
 Brush the top of the pie with the reserved whisked egg. Using a large sieve, sprinkle the pie with granulated sugar.


 Transfer to a floured tea towel to dry.


 The sauce is light, yet deeply flavorful, infused with garlic, fresh tomatoes, and the briny sweetness of juicy shrimps. If you can’t buy the misto, it’s easy enough to make it with fish fillets and shellfish of your choice but if you include calamari, please make sure to cut them in quite small pieces or they will not cook with the rest of the fish.